Wednesday, November 2, 2016

Need a quick and cute gift? Why not make some cute seed bead friendship stacking bracelets? You can whip these little beauties out in no time flat. Below are instructions on how to make seed bead stacking bracelets.


Step 1: round up your materials


Grab our stacking bracelet seed bead kit here! OR search for what you already have
Decorative headpin (1)
Crimp bead covers (2) OPTIONAL
Crimp beads (2)
Chain extender (or you can link jump rings together)
Jump rings
A combination pliers tool (or crimp bead tool, flat nose pliers, round nose pliers, and nipper)
Wire


Step 2: 
Snip your wire (the average wrist size is 7", and you'll want to allow an extra couple of inches for stringing), next add on your first crimp bead, then your clasp, then feed the wire back thru the crimp bead - and crimp your crimp bead!


Step 3:
Start stringing your beads - this is the fun part!


Step 4:
After you've finished stringing - add a crimp bead, next your chain extender, then loop the wire back thru the crimp and a few of the beads.


Step 5:
Add on your charm, and cover the crimp beads with crimp bead covers. 


Step 6:
Add a bead onto a decorative headpin.
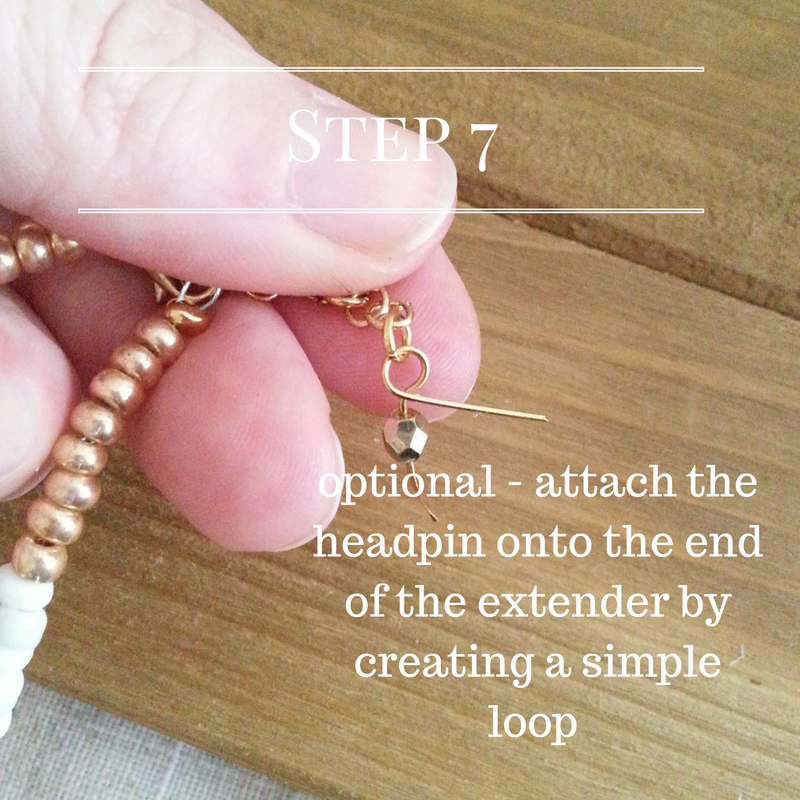
Step 7:
Attach the headpin onto the end of the extender by creating a simple loop.


Step 8:
Done! Now wear, and make more!


Tuesday, July 26, 2016

Essential oil jewelry is so popular right now. This bronze essential oil locket necklace is a must for essential oil lovers. A great way to keep your oils close without applying to the skin. This cute DIY essential oil locket necklace is easy and fun to make. These necklaces are great for wearing, selling, and gift giving! 


Let's get started.


What You Need:
Flat Nose Pliers
Wire


Step 1: snip one link of the chain in the very center (on the end opposite of the closure)


Step 2: set chain aside, grab beads and wire, and create two separate three bead rosary style (simple loop) strands


Step 3: connect the bead strands to the chain


Step 4: set necklace aside, grab some wire and create a figure 8 shape (make one side smaller than the other)


Step 5: pickup the necklace and connect the strands together with the wire figure 8


Step 6: add your locket, tassel, and charm


DONE! Yay :) Now, go add some essential oil and wear it!


Monday, July 25, 2016

Tassel bracelets, tassel necklaces, really any tassel jewelry is so popular right now! Here is a quick, easy tutorial on how to make your own DIY tassel for your next creation.


Gather up what you need (which isn't much!):


Embroidery Floss
Jump Ring (a larger one)
Scissors
Flat Nose Pliers


Step 1: Open jump ring with flat nose pliers, and put thru the loop of the embroidery floss


Step 2: Close jump ring, then cut the floss to the desired length


Step 3: Pull out and use one of the threads, and tie around the tassel near the top


Done! So easy :) Now add it to your favorite jewelry creation. 


If you'd like to add your tassel to a bracelet like the one above, I used the following materials: 
Handmade Tassel
Silver Hamsa Charm (for good luck)
Stretch Cord (I used 3mm, but you may use whatever size fits your needs and beads!)

How will you use the tassel you just made?


Tuesday, June 28, 2016

Fun Learning Activity for Toddlers to Help with Dexterity

How to make learning fun for toddlers? 


With a two year old, I'm always looking for new ways to foster creativity and teach at the same time. I'm constantly perusing Pinterest for new "Fun learning activities for toddlers", but sometimes I just have to wing it. 


Well, it goes without saying that...

and so of course does my little one. She loves stringing beads. Not only does it keep her creative juices flowing, but she learns colors, counting, and improves dexterity. There's of course also the thrill of creating something with her very own pudgy, cute little two hands. That's not just a toddler thing, I think we all love to see the fruits of our labor. It's also a great opportunity to spend one-on-one time with my little love. Children's pre-made beading kits are a great choice, especially if your schedule is anything like mine! They are also a fun, affordable activity for your little girl's next birthday party (activity and favor all in one - score)!


Now, go have some fun!


How To Make A Simple Loop and Rosary Style Chain

How To Make A Simple Loop Rosary Style Chain

a quick and easy to follow infographic


How To Use A Crimp Bead Crimper Tool

How To Use A Crimp Bead Crimper Tool

a quick and easy infographic tutorial on how to properly close a crimp bead


How to Make a Watch with an Interchangeable Band

Jewelry is so much fun to make. These watches with interchangeable bands are great for gift giving or selling. Make multiple bands to wear with different outfits! Learn how to make this unique DIY handmade gift that people will actually want to receive! Fun and easy steps are below:


Let's get this party started.


        Gather Up What you Need    
Beading Wire or Elastic Cord
BeadsWatch Face    
Crimp Beads (x2)
Lobster Closure Clasps (x2)    
Charms (x2)    
Crimp Bead Crimper Tool    
Nippers
Flat Nose Pliers


Step One
-Cut your cord to desired length (measure your wrist, and allow for the watch face if you're making  
 as a gift, the average wrist is around 7")
-Slide on your crimp bead, then through the lobster closure, then back through the crimp bead to   
 create a loop.


Step Two


Step Three
- Begin stringing beads


Step Four
-Finish with a crimp bead and lobster closure as you did in step 1


Step Five
- Make sure when you cut your cord that you leave enough to tuck down into the first bead


Step Six
- Add charms


Voila. Done!